

Appliqué embroidery combines fabric pieces with decorative stitching to create stunning, dimensional designs that stand out from traditional flat embroidery. Modern computerized embroidery machines have revolutionized this ancient technique, making it accessible to both hobbyists and professional embroiderers. Whether you're looking to add texture to garments, create eye-catching patches, or develop unique decorative pieces, mastering appliqué with an embroidery machine opens up endless creative possibilities.
Understanding Appliqué Embroidery Basics
What Makes Appliqué Different
Appliqué embroidery differs significantly from standard embroidery techniques because it involves layering fabric pieces onto a base material before securing them with decorative stitching. This method creates a three-dimensional effect that adds depth and visual interest to your projects. The process requires precise timing and coordination between your embroidery machine's functions and manual fabric placement. Understanding this fundamental difference helps you appreciate why appliqué designs require special digitizing considerations and specific machine capabilities.
The beauty of appliqué lies in its versatility and the dramatic visual impact it creates. You can combine different fabric textures, colors, and patterns to achieve effects impossible with thread alone. From corporate logos on uniforms to whimsical children's clothing designs, appliqué adds professional quality and durability that makes your finished products stand out in the marketplace.
Essential Components for Success
Successful appliqué work requires several key components working together harmoniously. Your embroidery machine must have adequate hoop space to accommodate both the base fabric and appliqué pieces without shifting. The machine's tension settings need precise adjustment to prevent puckering while ensuring secure attachment of appliqué materials. Thread selection becomes crucial, as you'll need both construction threads for securing appliqué pieces and decorative threads for finishing touches.
Stabilizer choice plays an even more critical role in appliqué than in regular embroidery. The additional fabric layers and varied stitching densities require stabilizers that can support the increased weight and prevent distortion throughout the embroidery process. Many professionals recommend using tear-away stabilizers for most appliqué projects, though cut-away stabilizers work better for stretchy or delicate base fabrics.
Selecting the Right Embroidery Machine
Key Features for Appliqué Work
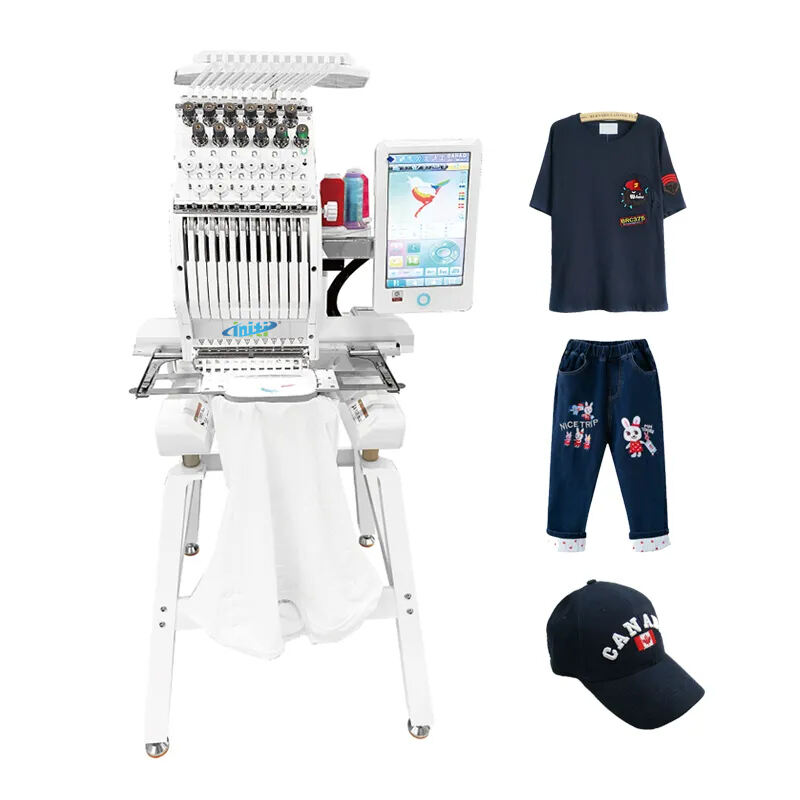
Not every embroidery machine handles appliqué work equally well. Look for machines with large embroidery areas, as appliqué designs often require more space than standard embroidery patterns. A quality embroidery machine should offer precise speed control, allowing you to slow down during critical appliqué placement steps while maintaining consistent stitch quality. Advanced tension controls help manage the varying thicknesses created by layered fabrics.
Threading capabilities become particularly important for appliqué work since you'll frequently need to change thread colors and types throughout a single project. Machines with multiple needle positions or automatic thread cutting features significantly streamline the appliqué process. Some high-end machines even offer appliqué-specific functions like automatic jump-stitch trimming and programmable pause points for fabric placement.
Software and Design Considerations
Appliqué designs require specialized digitizing software that can create the multiple embroidery steps needed for proper appliqué construction. The software must generate placement lines, tack-down stitches, and finish stitching as separate elements within the same design file. Many embroidery machines come with basic appliqué capabilities, but professional results often require more sophisticated software packages that offer precise control over stitch sequences and densities.
When evaluating embroidery machines for appliqué work, consider the file format compatibility and design editing capabilities. Machines that can read multiple file formats give you access to a broader range of appliqué designs from various sources. Built-in editing functions allow you to resize, rotate, and combine appliqué elements without returning to your computer, increasing efficiency during production runs.
Materials and Preparation Techniques
Fabric Selection Strategy
Choosing appropriate fabrics forms the foundation of successful appliqué embroidery. Base fabrics should provide adequate stability while complementing the appliqué materials in both weight and care requirements. Cotton, cotton blends, and denim work exceptionally well as base materials because they hold their shape during the embroidery process and provide good needle penetration without excessive wear on your embroidery machine.
Appliqué fabrics require different considerations than base materials. They should cut cleanly without excessive fraying while maintaining their appearance through multiple wash cycles. Cotton fabrics, felt, and specialty appliqué materials offer the best combination of workability and durability. Avoid stretchy or loosely woven fabrics for appliqué pieces unless you're experienced in managing their unique challenges during the embroidery process.
Cutting and Preparation Methods
Precise cutting ensures professional-looking appliqué results and prevents fabric shifting during embroidery. Create templates from your appliqué design files, adding appropriate seam allowances based on your finishing technique. Many embroiderers find that cutting appliqué pieces slightly larger than the final size gives them flexibility during placement while ensuring complete coverage of the underlying area.
Stabilizer preparation becomes more complex with appliqué projects since you're managing multiple fabric layers with varying characteristics. Pre-cutting stabilizers to match your hoop size eliminates waste and ensures consistent support across the entire embroidery area. Some projects benefit from using temporary spray adhesives to secure appliqué pieces before the tack-down stitching begins, preventing shifting that could misalign your design elements.
Step-by-Step Appliqué Process
Initial Setup and Placement
Beginning any appliqué project requires careful setup to ensure accurate placement and prevent costly mistakes. Start by hooping your base fabric with appropriate stabilizer, ensuring even tension across the entire embroidery area. Most embroidery machines require you to establish a reference point or perform calibration procedures before starting appliqué designs, so follow your machine's specific requirements for optimal results.
Load your appliqué design file and verify all color stops and pause points are correctly programmed. Many appliqué designs include placement guides as the first embroidery step, creating visible lines that show exactly where to position your appliqué fabric pieces. These guidelines are crucial for maintaining design alignment, especially when working with multiple appliqué elements or complex geometric patterns.
Embroidery Sequence Management
The typical appliqué sequence involves several distinct phases that must be completed in order for successful results. First, your embroidery machine stitches placement lines that outline where appliqué pieces belong. Next comes the tack-down phase, where light stitching secures the appliqué fabric to prevent movement during subsequent steps. Finally, decorative stitching covers raw edges and adds finishing details that complete the appliqué appearance.
Managing thread changes and pause points requires attention to your embroidery machine's display and audio cues. Most modern machines will automatically pause at programmed points, allowing time for fabric placement or trimming excess material. Some designs require you to change thread colors between appliqué steps, so having your thread selection organized and easily accessible streamlines the entire process and reduces the likelihood of errors.
Advanced Techniques and Troubleshooting
Complex Multi-Layer Appliqué
Advanced appliqué projects often involve multiple fabric layers that create sophisticated visual effects and dimensional qualities. These complex designs require careful planning of stitch sequences to ensure each layer attaches securely without interfering with subsequent elements. Your embroidery machine must maintain consistent tension and stitch quality throughout varying fabric thicknesses, which may require tension adjustments between design sections.
Managing bulk becomes increasingly important as you add more appliqué layers. Strategic trimming of excess fabric between layers prevents unnecessary thickness while maintaining the design's integrity. Some embroiderers use specialized scissors or craft knives to trim close to stitching lines, though this requires steady hands and practice to avoid cutting through important design elements or damaging the base fabric.
Common Problems and Solutions
Thread breaks frequently occur in appliqué work due to the increased friction and tension created by multiple fabric layers. Using high-quality threads appropriate for your specific embroidery machine reduces break frequency, while regular needle changes prevent dulling that leads to poor stitch formation. If breaks persist, check your machine's tension settings and ensure the appliqué fabric isn't creating excessive drag during stitching.
Fabric puckering represents another common challenge in appliqué embroidery, often caused by inadequate stabilization or incorrect hoop tension. Adjusting your hooping technique to distribute fabric tension evenly usually resolves minor puckering issues. Severe puckering may require switching to a different stabilizer type or adding additional stabilizing layers beneath particularly problematic fabric combinations.
Finishing and Quality Control
Professional Finishing Techniques
Achieving professional-quality appliqué results requires attention to finishing details that separate amateur work from commercial-grade products. Careful trimming of jump stitches and backing threads creates clean appearances that enhance the overall design impact. Many professional embroiderers use small scissors or thread snips designed specifically for close trimming work, allowing precise removal of excess threads without risking damage to the appliqué elements.
Heat pressing or steaming finished appliqué pieces helps set the stitching and create smooth, professional appearances. Use appropriate temperature settings for your fabric combinations, and always test on sample pieces before applying heat to finished projects. Some synthetic appliqué materials may require lower temperatures or alternative finishing methods to prevent melting or distortion.
Quality Assessment Standards
Developing consistent quality standards ensures your appliqué work meets professional expectations across all projects. Examine stitch density and coverage, looking for gaps or thin areas that might compromise durability or appearance. Well-executed appliqué should show smooth, even stitching that completely covers raw fabric edges while maintaining design clarity and dimensional effects.
Durability testing becomes particularly important for appliqué items that will receive heavy use or frequent washing. Gently tugging on appliqué edges should reveal secure attachment without lifting or distortion. Commercial appliqué work often undergoes wash testing to ensure colorfastness and dimensional stability through multiple cleaning cycles, standards that serious embroiderers should adopt for their own quality control processes.
FAQ
What type of stabilizer works best for appliqué embroidery
Tear-away stabilizers generally provide the best results for most appliqué projects because they offer strong support during stitching while removing cleanly without affecting fabric drape. For stretchy base fabrics like knits or jersey materials, cut-away stabilizers provide better long-term support. The stabilizer weight should match your project complexity, with heavier stabilizers needed for dense appliqué designs or multiple fabric layers.
Can I use regular embroidery designs for appliqué work
Regular embroidery designs cannot be directly converted to appliqué because they lack the specialized stitch sequences required for fabric placement and tack-down procedures. Appliqué designs must include placement guides, tack-down stitches, and properly sequenced color stops. However, you can use regular embroidery designs as decorative elements over appliqué pieces or incorporate appliqué elements into standard embroidery layouts with proper planning.
How do I prevent appliqué fabric from shifting during embroidery
Proper fabric placement within the stitched guidelines provides the primary defense against shifting, but temporary spray adhesives offer additional security for problem fabrics. Ensure your base fabric is hooped with appropriate tension, and avoid stretching appliqué pieces when positioning them. Some embroiderers use lightweight fusible interfacing on the back of appliqué pieces to add stability, though this technique requires careful heat application to avoid affecting the base fabric.
What needle size should I use for appliqué embroidery
Needle selection depends on your fabric combination and thread choices, but 75/11 or 80/12 embroidery needles handle most appliqué projects effectively. Heavier fabrics or multiple layers may require 90/14 needles for adequate penetration, while delicate appliqué materials work better with 70/10 needles to minimize fabric damage. Change needles frequently during large production runs, as the additional fabric layers cause faster dulling than standard embroidery work.